Monday, July 26, 2010

Quick update -- stairs, floor tiles and Masters Miniatures!

Hello!  I miss you all so much -- as always happens, the opera workshop has taken over my life :)  I had a day off yesterday that I was LONGING to fill with miniature making, and I was just so tired that every time I thought about doing something other than sleeping, I couldn't summon the energy.


But I got a number of packages last week, and I thought I'd share the contents of two of them.

First of all, here's the staircase unit for the hall:


I still have some touch up work to do, but that's basically it.  I used a real door for the closet, which made things easier :)


In front of it you can see the gorgeous faux marble tiles I bought from Graham at Traditional Elegance Tiles.    They're called "Marlike", and they look absolutely perfect, and they're perfectly made, which will be a bonus :)  I ordered four packs of the diagonal tiles, which include half tiles which will make the whole installation much easier.  Once I get the walls in, and the stair unit installed, then I can cut a piece of cardboard for the floor and install the tiles on that.

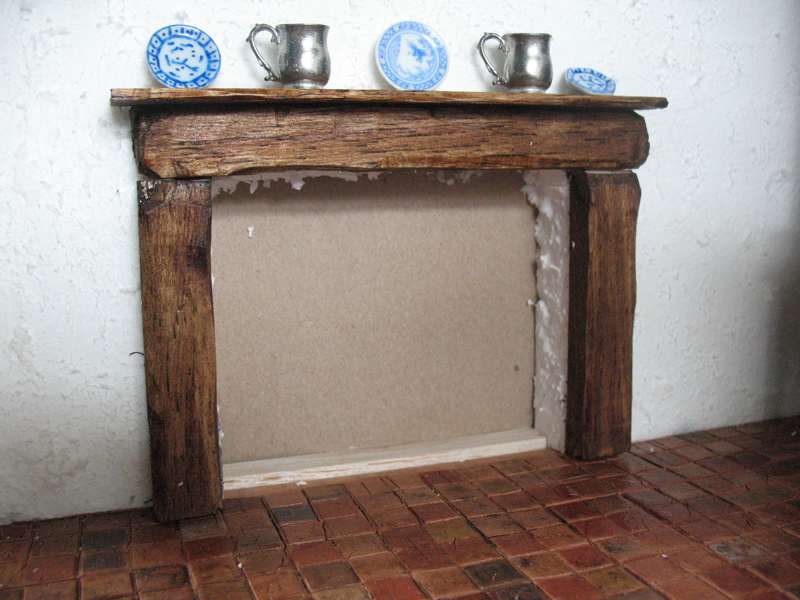
And I got a package from Masters Miniatures which exceeded my expectations (and I was pretty damned excited about them, anyway)!  Look at these beauties:


Here's a Charles II hall chair. I may already have mentioned that I've got a bit of a furniture fetish for barley twist legs :)  I think it's very important when doing a period space, even when it's as relaxed in attitude as this one, to have a few pieces that are really iconic of the time.  This is such a classic chair, that I couldn't resist!


This is a fire screen, and it's SO charming!  It's actually adjustable up and down, too :)


And, finally, here's a tiny wooden flute.  I've been looking for period-looking instruments for some time, and Masters makes all sorts of lovely pieces.  It's just perfect.  I would feel confident ordering anything from them -- this is first class work and, if you check out the site, it's very, very reasonable for handcrafted pieces of such quality.


Okay, I must drive to Halifax now to direct some opera, but I'll surface when I can!

(If you want to see the sort of thing I'm up to, you can visit the Halifax Summer Opera Workshop site.)

Sunday, July 18, 2010

Wallpaper and panelling for the WAHM dining room


This is what the dining room in the William and Mary House looks like this morning :) I worked SO hard yesterday on panelling and wallpapering and so forth (and I have the gluey, stain smeared fingers to prove it :) and I've taken some photos to show the steps I went through.


I started by cutting a chimney breast for the fireplace and wrapping it in wallpaper.  I had stained the plywood to wainscot height (about 3"), thinking that I could build the panels right onto the plywood for the two side walls and onto basswood for the back, foam wall.  It looked like crap -- big, ugly plywood grain, so I decided to use basswood for all three walls.  I was lazy, and didn't want to cut the 4" wide basswood strips I had, so I decided to have slightly higher wainscotting than is usual :)


For the back wall I cut a length of basswood sheet to fit, roughly centred the window and cut a little slot in the sheet for the window and glued the window to the sheet. Then I put in the chair rail, rather roughly coping it around the sill.  I used some 1/4" moulding I found at my local building supply store (so it's cheap) for the chair rail, and I'm pleased with the way it looks.   Here's its profile:

The above photo shows the basswood sheet covering the plywood and the chair rail going on by the door and along the side of the fireplace mantle (to tie the fireplace in with the panelling).  The green tape, by the way, is covering the gawd-awful gouge where I made a bish of cutting out the door hole with my new Trio, hem hem).

Now the wallpaper can be stuck on!  Look, ugly green tape disappears!

The back panelling isn't stuck on yet, of course, because it will be more tidy to wallpaper that wall first and then stick on the panelling.  But I've added a very simple baseboard (about 1" wide and very thin -- just pine offcuts) and very simple uprights (stir sticks, actually :).  My Easy Cutter is getting a work out!


They tell you to stain your woodwork first for a reason :)  I had to be really, really tidy around the wallpaper on the left side because I did the panelling first and then stained it. 


I cut out the hole for the window and then test fitted the rear panelling -- all seems well.


I then applied the wallpaper to below the line of the panelling and glued it on, cutting out the window.  Do not use Quick Grip glue on polystyrene, by the way -- it eats it :)  PVA is fine.  There was some bubbling of the wallpaper that worried me at first, but it dried nice and flat.


Still needs some touch ups, but it's pretty close.  I was on some bizarre high from getting all this done, so I decided to so some wiring, which of course has to be done before everything is glued in place if it's on an interior wall.

I drilled holes through the chimney breast for the two sconces and the fire. The wires will run up the back of the chimney breast (which will be stuck on with Museum Putty and along a channel at the top of the wall to the back and the plug board.


Here's the fireplace with sconces, fire, a large Raphael over the mantle and some blue and white pieces. This fireplace came with a barewood hearth -- I cut some faux stone sticky tile to fit rather than marbling it myself with paint.


And here's the window area.  While my hands were covered with Mission Oak stain, I decided to stain this little sideboard as it was going to live here anyway (I decided on the window placement so that it would clear the sideboard, actually).


I also did some work on the stairway, but I'll share that later because I'm going to be posting fairly infrequently over the next three weeks.

Welcome to our new followers!


Sorry, I still don't have my 200 follower giveaway organized (and it may be a little time before I get around to it), but I didn't want to delay welcoming our latest followers :)

Welcome to:

Maria who lives in Rotterdam and blogs at Diary of a Miniaturist.

La Belle Brigante, another Dutch miniaturist, who has a great blog at La Belle Brocante and has a tremendously cute cat named Ootje :)

Miniature doll maker Silke Janas-Schlösser is from Germany.  She has many blogs, but the main one seems to be Silke's Miniatures, and she has a shop at Etsy

Kiki blogs at Living in Food Harmony, among other interesting places :)  Her photography is gorgeous!

Christina is an Indonesian miniaturist and she blogs at Miniature Wonderland

José lives in Spain and is building an amazing miniature castle -- he blogs at Mi Prrimera Casita.

Mercedes from New Zealand is one of the best-known miniature bloggers out there (I've tried rewording that so it doesn't sound as if she's 6 inches tall :).  Her blog, Liberty Biberty, is full of shabby chic inspiration and the adventures of the Nylon family.  If you haven't checked it out, go visit!

Looking Glass Miniatures have several sites, including their principal blog, and other sites for their miniature apothecary blog and Hobbit dollhouse blog!  They also have an Etsy store!

Zsuzsanna Paláné Horváth is a Hungarian miniaturist who blogs at Dreams In Miniature.

Minnie Kitchen is a miniature food artist from the U.S.A. who blogs at Minnie Kitchen and has an Etsy shop.

Kabrina Dawn lives in Arizona and blogs at Kabrina's Miniatures

There are also Shelly, Nadia Navaez, fmagico, and , whose websites I can't seem to find.  You're most welcome, and if you do have a website, blog or shop, please leave the URL in the comments so we can all find you!

Saturday, July 17, 2010

Holiday Swap, Dremel Trio and Stokesay!

Hello!  Sorry I've been neglectful, but I'm deep in preparations for the Halifax Summer Opera Workshop which I run and stage direct for.  We start up on Monday and there's loads to do!

First of all, the WONDERFUL minis from Paky arrived for the the Holiday Swap!


Look at these!  They're all handmade and so beautiful, so sweet!  The beach bag is full of everything I'd need - a towel, a newspaper, and look at that little shell charm ... I love the little thongs, and the perfect bikini, too!  And there's even refreshments :)  Paky, thank you SO much for all your beautiful work -- I'm honoured to have received it and will treasure it always :) 

Next, my Dremel Trio arrived.  After Casey blogged about it, I had to have one of my own :)


It's a plunge or turn saw, plus a router plus a sander, and I love it!  I've got a lot of doors and windows to cut out of plywood for this house, and I knew I'd appreciate a tool like this one :)  On my first trial run, I can say that it works really well. Like any turn saw, it cuts with a spinning bit, not a blade (this is how you can just plunge it into the plywood and start cutting windows, say, without drilling holes first).  This means that it pulls to the left, all the time -- once you get used to that, it's pretty easy.  I found running it on a high speed but cutting really slowly increased my control of it.

My first order from Stokesay Ware arrived yesteday, and I'm dumbfounded by the perfection of these miniature plates.  They're SO thin, it's incredible.  And the detail ... everything is perfectly in scale, and you know how hard that is to find in dishes. Thank you so much, Catherine, for ordering your own and inspiring me to start my own Stokesay collection :)


My first wallpaper order arrived, from Itsy Bitsy Mini in the US.  I ordered three sheets each of three pattens and I love them all!   I've got more wallpaper on order from various suppliers, and now I'm desperately trying to make up my mind which room gets which pattern!

I think I'm going to use this Jacobean blue and white pattern for the dining room.  It will be half panelled with a wainscot so the wallpaper will just be on the upper half of the room, but here's an idea:

Wednesday, July 14, 2010

WAHM staircase, day one

I'm grappling with the staircase for the entrance hall of the William and Mary House right now.  Once I work out the ground floor one, the first floor one will go more smoothly, I hope!

I'm building the whole thing from scratch, because I've spent so much money on this in other places that I have to save money where I can :)  David has a workshop full of pine scraps and some cool tools, so he cut the strips of triangular wood on his table saw, and I chopped them to length on the chop saw.

This will be a bit of a tutorial on one of the many ways of building a staircase.  This is what you need in 1/12 scale to get started building a standard set of stairs that would be 30" wide in 1:1 scale:
  1. Several feet of 3/4" triangular section wood moulding: either buy it from a lumber yard, cut it yourself or buy balsa or basswood already cut
  2. A thin piece of basswood or pine (or even cardboard) 2.5" wide and as long as you need to go from floor to above the ceiling.  This is the base of your staircase.
  3. Lengths of thinnish strip wood as wide as your triangular moulding + base is thick.

Cut the triangular wood stock into 2.5" inch lengths (or whatever you want the width of your staircase to be).


Glue them, pointy side up, to your base.  When it's dry you can add trim to the sides to conceal the construction, like so:


I'm making a staircase that will take up the whole back of the entrance hall.  it's going to have three steps up, then a landing, then stairs all the way up the back wall of the hall to the first floor.  The whole will be enclosed and panelled.

Here's the next step for me -- visualizing the construction (none of the side walls are permanent yet -- it's just to give me a sense of the space I have to work with.)


I cut a trial landing out of thin plywood -- it's resting on top of a table in the back right hand corner.  I made a small set of steps to get to the landing and then the longer one runs right up.  The whole area under the stairs will be enclosed, possibly with built in shelves and cupboards and so forth.  I think it's going to work! 

I'm going to build this unit so that it's totally self-supporting and separate.  That means that I will just stick it in place when the rest of the decoration of the hall is done, which I think will be easier than trying to decorate around it.  I've ordered my spindles, and I'm going to try to carve my own newel posts and handrail.   We'll see how it goes - I may be ordering those, as well!

Tuesday, July 13, 2010

WAMH kitchen fireplace and doors!


Well, I made good use of the time I had yesterday, and got a lot of work done on the kitchen, namely the plastering (but not the painting) and the kitchen fireplace mantle.


I cut out the opening in the foam, and backed it with a bit of cardboard.  The mantle itself is made from carved balsa wood, stained Mission Oak.  I just need to make a couple of brackets and attach them under the mantle shelf (and touch up the stain) and the surround is done.  Then I need to line the interior with brick and add a hearth.  But I'm quite pleased!


I also plastered the two foam walls of the kitchen, using PolyFilla mixed with white glue (because I wasn't at all sure that PolyFilla on its own would stick to the polystyrene).  Incredibly messy and strangely satisfying, and it worked just fine -- now I need to paint them so they're not so stark white :)

And I got a lovely package full of doors yesterday -- five interior doors and the big front door for the house!  I've never made a proper house before (the Castle is really just a series of giant room boxes) so I've never had real doors, and it's quite exciting :)

Sunday, July 11, 2010

Update on WAMH

I haven't had much time for the William and Mary House today, because I've been trying to finish off my swap gifts for Caterina's Holiday Swap :)

But after messing with the tiles yesterday, I'm now at this point:


That's not the real kitchen fireplace, of course, it's the dining room fireplace, just put in these photos as a visual placeholder to help me visualize proportions better.

And here it is in its true home in the dining room.  You really have to use your imagination for this one :) Imagine panelling and scenic wallpaper in here ... I really like Kris's settee here, too -- I may have to get her to make me a different one for the parlour!  This is an old-fashioned dining table for 1697-1710, but I'm imagining that the owners of the house are a tad eccentric!

Saturday, July 10, 2010

Painting kitchen floor tiles - day two

I've found photographing my projects to be immensely helpful when trying to recreate something in real life.  I think we've all had the experience of thinking something looked fine, then taking a photo of it (especially a macro photo or a shot from "doll's eye" perspective), and realizing that we've screwed something up :)

This is very true as I continue my journey with the kitchen floor!

First of all, this is my inspiration photo.  I love the fact that the tile colours are so varied, yet all clearly belong together.  They're grounded, somehow.


And here's where things are this morning, after working over the floor with the original pigments, adding ultramarine blue and ochre.


I can see that I'm getting there, for sure.  It's not dreadful, but it all needs to be tied together.  I need to stipple the tiles with a darker colour, especially the paler tiles.  I need to put in a nice dark wash for the grout (that will be easier now that it's all sealed -- I can wipe the wash off the face of the tiles, leaving the pigment in the grout lines.  I also don't have to be afraid of using more and richer colour.  I think I'll do one more pass with some deeper terracotta colours and then try to create the grout look.

If anyone has some ideas, please shout out!

Friday, July 9, 2010

Painting kitchen floor tiles

NB: I'm laughing right now, because looking at the photos I took of the process of painting the floor clearly reveals that a cat or cats used the kitchen floor for a napping place sometime over the last day or so :)  I didn't actually notice the incredible amount of cat hair until I was putting an acrylic glaze on the floor!

Here are the tiles before I started painting -- dry, not shrunk at all, but cracked in places.


I don't think I've ever painted clay before, certainly not as an adult.  What I should have realized was that it's incredibly absorbent, of course. 

I did a watery wash of raw umber, first, to bring out the grouting.


The paler places are where the tiles have dried right out. Fortunately a little of the raw umber was left where I wanted it.


I then did what I'd normally do:  start putting on thin washes of colour (palette at the moment raw umber, burnt sienna and black) on individual tiles.  The thin washes didn't work terribly well, because the water dried leaving very little impression of the pigment.  I decided to seal the tiles before going any further (which I would do right at the beginning, in the future.


I used what I had on hand - acrylic gloss medium really watered down (to take away some of the gloss).  Seems to work fine.  Any clear acrylic craft finish with a satin or matte finish would be great.

Ah, cat hair.  *sigh* But this close up of the tiles after being sealed shows that they're definitely coming along.  Lots to do yet, but it's a good first stage.

I couldn't resist popping the walls back in place (the door has been glued on the back wall, as you can see) and taking a look at the scene, even though it's really far from being done :)  I think I'm going to like it!

Thursday, July 8, 2010

William and Mary kitchen door

I decided to use the lovely strap hinges I bought in England on a rather rustic kitchen door I'm making for the WMH. 

They're real metal, but a darkish grey, and I asked David if I should paint them to make them look more like iron.  "Use the black patina", he suggested.

If you don't know it, black patina is used by ship and railway modellers, but it's mostly used by stained glass artists, to give lead or solder the dark patina of age instantly.  David introduced me to it a few years ago for another project I was working on.

And it worked brilliantly on the little hinges!  You can still see that they're metal (once you paint them, they might as well be plastic) and it darkens them enough to make them look authentic.


I bought a smallish bottle of the stuff last year in Toronto at a stained glass supply shop, and it will probably last me years :) You can try it on all sorts of metals.  You just brush it on and if it's going to work, it works instantly. Chemistry is magic!

This door will go in the back of the model. It will probably never be used, but it's got damned good looking hinges! It was made precisely the way I made the kitchen door for the castle, but I just bevelled the edges of the boards rather than really going to town on the carving ...

Wednesday, July 7, 2010

Ground floor foam walls

I'm on a roll!  I just can't stop cutting foam!

Here's the back wall in place --about 47" long and 11 inches high:


Now for the tricky one:  the gable end of the kitchen.  Because the kitchen is just a one storey extension to the main building, the kitchen end of the house needs to be angled to take the roof (which will be non opening).  I decided to add part of the chimney, too.  Because the front edge of the foam is set back 3/4 of an inch from the front edge of the model, so that a wooden facing strip can be put on it, I have to take that into account when designing my roof.

Right angles are good for the up and down bits ...


45 degree angles for the roof line:

Here's the gable end all drawn out:


And here it is propped in place!  You can see that when the 3/4 inch facing strip is put along the front edge of the foam, everything should line up neatly (I fervently hope).

You can also see that I should have changed my blade near the end :)


But it's actually starting to look like a house!  Woo hoo!

And I've used less than $8.00 worth of foam :)

I've ordered some yummy things for the house -- flooring for the front hall, lots of wallpaper and a few light fixtures, but there're many things I can work on to get the model to the next step while I'm waiting for my purchases to arrive.

First I have to mark where the interior walls hit that back wall, so I can start marking in the rear window openings and the back door ...  Then I can make the staircase unit for the hall, the back door for the kitchen and the kitchen fireplace.
Related Posts with Thumbnails